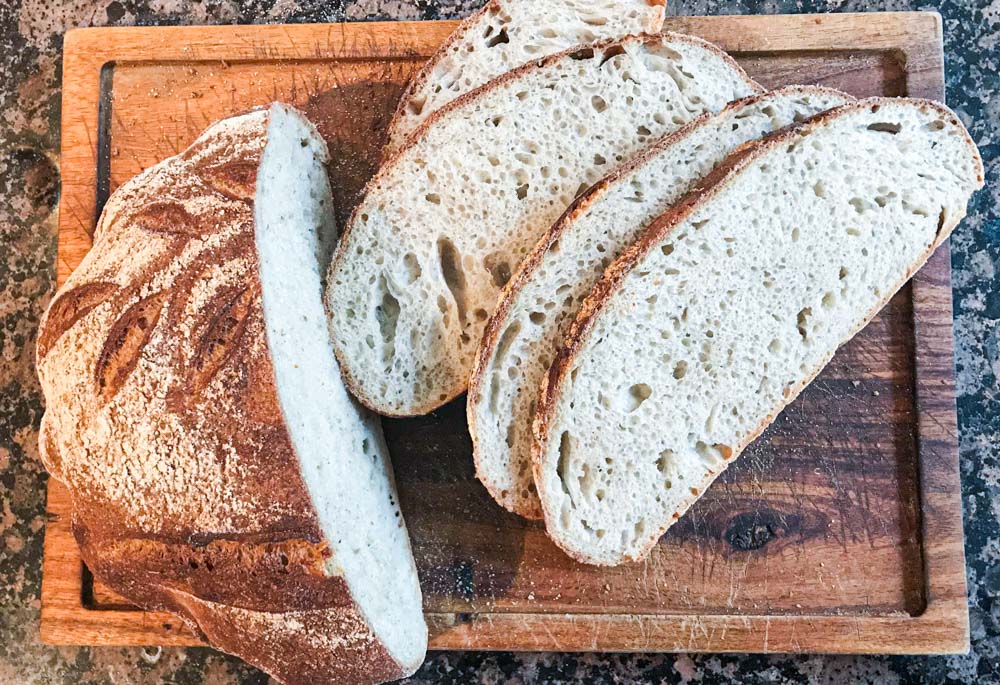
Baking bread is good for the soul and the only thing better than baking bread is eating it. I absolutely love bread.
I love the history of bread, the regional differences, middle eastern flat breads, Italian ciabattas, crispy French baguettes, and more than anything else a super tasty sourdough.

Sourdough seems to be more popular than ever right now and rightly so. Who wants to eat some bland, bleached, mass produced sliced loaf when you can have something which tastes fabulous?
Sourdough has health benefits too. The slow fermentation process that gives sourdough its depth of flavour, also makes the bread easier to digest as well as releasing more nutrients from the grains than bread made with dried packet yeast.
But how difficult is it to make? Well the good news is that making sourdough is a reasonably simple process. It needs a little preparation and some lead in time, but good sourdough can be made with only three simple ingredients: flour, water, salt.
In this guide we’re going to explain all the bread baking tools that you need to get started on your road to sourdough greatness and first though you need to make your sourdough starter.
How to make a sourdough starter
Equipment
If you are going to bake bread regularly then are a few items that will help you on your way. You can pick these up quite cheaply online or from specialist cooking shops, but you can also improvise without some of these items.
Scales – a set of scales is a must have. The one thing I’ve learned about baking is that precision is needed. Unlike with other forms of cooking, being gung-ho with quantity estimations tends not to end well with baking
Proofing basket – I have a few of these in different shapes, but a round proofing basket with a cloth liner is best if you are starting out as I find round loaves easier to shape. You can improvise with a large bowl and tea towel.
Dough scraper – a scraper becomes a bread makers best friend, especially when dealing with stickier doughs as it minimises the need to use your hands when moving dough from bowls or shaping.

Baker’s lame – a lame is a slashing tool for scoring the bread. Scoring allows the bread to expand during the oven spring (when the bread rises rapidly after it goes into the hot oven). It also allows you to carve some creative patterns into your bread. You can also use a very sharp knife or razor blade for this.
A kilner jar or two – I use these for managing my sourdough starter but any sealed container will do the job. These should be able to hold up to 1 litre of liquid.

OK..
What is a sourdough starter?
Sourdough starter is gloopy mix of flour and water that naturally ferments and has been helping humans to leaven bread for over 5000 years. Flour and water are mixed into a paste which then traps natural yeast microbes and bacteria from the air. These break down the sugars in the flour, which in turn releases carbon dioxide which gives the bread its bubbles and makes it rise. Another by-product of this process is lactic acid which gives the bread its sour tang.
Creating a starter from scratch is a simple process but takes a few days to get up and running. Once your starter is healthy you can keep it active by regularly feeding it with fresh flour and water, or you can put it into hibernation by leaving it in the fridge. I’ve had my sourdough starter for a few years now and its going stronger than ever.
Ingredients and equipment for sourdough starter
400g of strong bread flour
425ml of tepid water
2 x kilner jars with lids or similar containers.
Method for Sourdough Starter
Day 1 – Combine 50g of flour and 50ml of water in a jar and mix until no dry flour remains. Loosely cover the jar with the lid and leave at room temperature for 24 hours.
Day 2 – Pour 50g of the starter mixture into a second jar and discard the remainder. Add 50g of fresh flour and 50ml of water to the mixture and stir until no dry flour remains. Loosely cover and leave at room temperature for 24 hours.
Day 3 – The starter should be starting to show some activity by now. You may see some little bubbles starting to appear in the mixture, but it probably won’t be rising too much in height yet. Pour 50g of starter mixture into a clean jar and discard the remainder. Add 50ml of water and 50g of fresh flour to the mixture and stir. Leave at room temperature with a loose lid for 24 hours.

Day 4 – Repeat as day 3
Day 5 – The starter mixture should be starting to see some activity now. It will be starting to smell slightly sour and should be crawling up and down the jar as it bubbles away but don’t worry if not. Today you are going to up the feeds to twice a day, approximately 12 hours apart. The timing does not have to be exact but try and feed in the morning and in the evening. Repeat the measures as in previous days; 50g of starter into a clean jar, with 50ml of water and 50 g of flour and mix well.

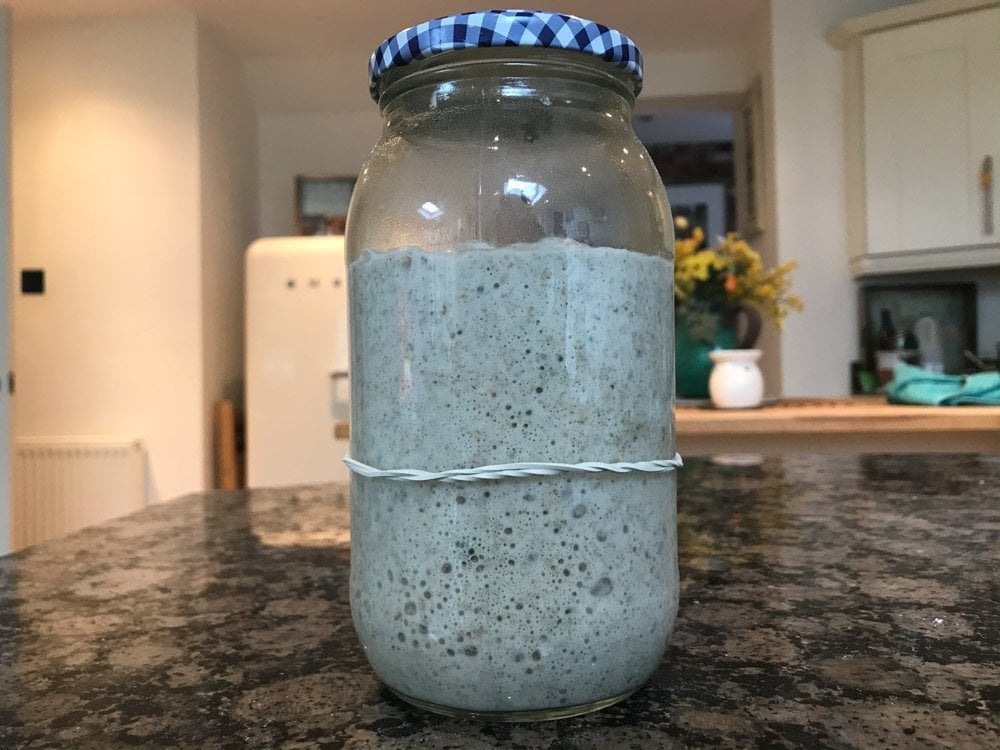
Day 6 – Pour 125 ml of water into a clean jar, add 75g of starter, and 100g of flour and mix well. If you have any rye flour then split the flour with 50g white, 50g of rye – rye works particularly well in starters. Mark the mixture so you can track how much it is rising. I put an elastic band at the height of the starter and then track where it is around 6 hours later. If the starter doubles in height, then you are good to use it in your sourdough loaf. If not, then just keep going for another few days with the twice daily feeds.
Now that you have a healthy starter you are ready to make bread, but you can keep this ticking over by refreshing the starter by following the measures in day 6. However, as most people are not baking every day then you might prefer to put your starter into hibernation. To do this put 62ml of water, 38g of starter, and 50g of flour (half white / half rye if you have it) into a clean jar and put into the fridge with the lid on. When you are going to bake again, get your starter out of the fridge, allow to warm up for 12 hours, and then restart the twice daily feeding process for a couple of days until you are ready to bake. If you are going months without making bread, then you can put your starter in the freezer and then thaw out when you need it. However, I often leave mine in the fridge for weeks at a time and can always revive it relatively easily. The liquid my separate so that a thicker mix sits underneath dark coloured water, but once you mix it up and refresh the starter it will get going again.

Next…. a beginner’s guide to actually baking sourdough bread

Sourdough bread sounds like it could be complicated to make but, it’s quite simple. All you need is flour, water, salt, and time. With sourdough it’s all about playing the long game with a slow fermentation process which deliver the flavour, and time is something that we all have at the moment. You’ll need some days to develop a good sourdough starter that will leaven your bread as well as imparting a lovely acidic flavour, and we’ve explained how to develop your starter in the previous post.
The taste is the reason why we make sourdough bread. Sure, there is something cathartic, and therapeutic about making bread, but the reason why we chose sourdough over a plain loaf is for that fabulous flavour. The acidic tang is created as a by-product of the natural fermentation process. A well-developed sourdough starter will slowly breakdown sugars and release carbon dioxide that helps the dough to rise, as well as releasing lactic acid which helps develop the flavour.
Flour, water, salt. That’s all you will need for this recipe where I’ll also explain some of the simple techniques that you will need to create a lovely sourdough loaf. As you develop skills and gain confidence you can expand your repertoire, adding more elements such as caraway and fennel seeds to create a fabulous rye sourdough, or fresh green olives and oil for an Italian inspired bread. However, we’re going to start with this simple recipe below which creates a lovely sourdough loaf.
Nutrition Facts
1 servings per container
- Amount Per ServingCalories230
- % Daily Value *
- Total Fat
1g
2%
- Saturated Fat .2g 0%
- Sodium 2mg 1%
* The % Daily Value tells you how much a nutrient in a serving of food contributes to a daily diet. 2,000 calories a day is used for general nutrition advice.


Hi Jeremy
Thanks for your feedback and I agree, homemade sourdough is one of life’s pleasures.
Happy baking
Paul
Great recipe. homemade sourdough bread is the best. Thanks for sharing.